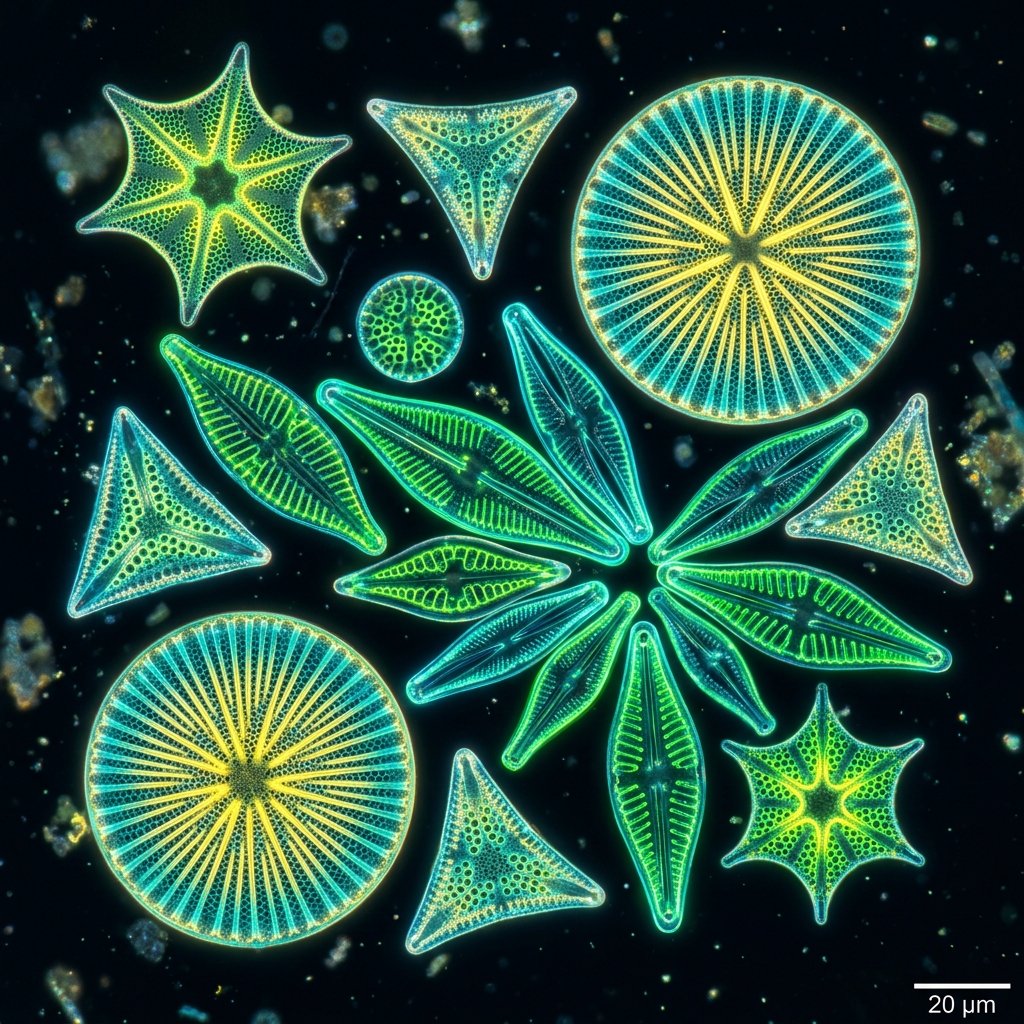
 Fig 1: Various diatom shapes featuring fine pores and geometric patterns etched into their glass (silicon dioxide) shells (*Conceptual image).
[!NOTE] *All microorganism images used in this article are conceptual 3D CG renders.
For centuries, microscopy enthusiasts have been captivated by a group of organisms known as diatoms (Bacillariophyceae), often calling them the “jewels of the microscope” or “artworks of light.”
Diatoms are a class of photosynthetic phytoplanktons that construct highly detailed, intricate cell walls made of glass (silicon dioxide/silica). These shells are covered in patterns of microscopic pores and geometric ridges so fine that reproducing them remains a challenge for modern nanotechnology. This article details a custom silicate-rich medium recipe and microscope adjustment hacks to grow and observe these glass gems.
1. Silicate (Silica): The Essential Mineral for Glass Shells
While standard plants and algae only require standard NPK fertilizer, diatoms require a specialized nutrient to build their glass walls: water-soluble silicate (silica).
Without adequate silicate dissolved in the water, diatoms cannot build their protective shells. As a result, cell division will stall, or their shells will deform and break. To culture them successfully at home, you must prepare a silicate-rich environment.
2. Preparing Silicate-Rich Culture Water at Home
Here is a straightforward and safe method to prepare diatom culture water using common materials.
Required Ingredients
- Base Water: Use commercial bottled “silica water” (natural spring water high in silica) or hard mineral water.
- Silicate Additives: Add a minute amount of water-soluble silicate garden fertilizer or liquid silica supplements sold for aquarium plants.
- Trace Nutrients (Fertilizer): Use a highly diluted liquid garden fertilizer (e.g. Hyponex diluted to approx. 1:10,000). Note: If fertilizer is too concentrated, green algae will bloom and outcompete the diatoms.
Culturing Steps
- Pour your silica-rich mineral water into a glass petri dish.
- Add a few drops of the 1:10,000 diluted fertilizer solution and a tiny trace of liquid silica (just a speck on the tip of a toothpick).
- Scrape a bit of the brown biofilm (where diatoms thrive) from a wet river stone or pond wall, and use a dropper to add a single drop into your dish.
- Expose the dish to an LED grow light for 12 to 14 hours a day.
[!TIP] Outcompeting Green Algae: The Light Shading Hack Diatoms generally prefer weaker light compared to common green algae (like Spirogyra). If you expose them to intense light, green filamentous algae will explode and choke out the diatoms. Placing your setup under diffused light (such as behind frosted glass) is a trick to select for diatoms, growing them like brown jewels.
3. Microscope Lighting and Contrast Hacks for Diatom Photography
Because the silica shells are completely transparent, standard brightfield illumination will wash out the geometric details.
- Narrow the Condenser: Close the condenser aperture under the stage as much as possible. This refracts the light sharply, outlining the glass shells and resolving the fine slits and pores.
- DIY Polarizing Filters: Place two polarizing sheets (such as film sheets from a craft store or an old LCD panel) in the light path. Rotating them to a crossed position (cross-polarization) causes the silica shells to glow in vibrant colors against a pitch-black background. (Refer to our guide on Microscope Lighting Hacks for instructions).
A precise glass masterpiece created by nature, thriving in a petri dish on your desk. Try culturing these beautiful microscopic crystal structures and witness their geometry yourself!
![[The Mystery of the Spring] Step-by-Step Guide to Collecting and Culturing Vorticella (Bell Animalcule) with Ultra-fast Contraction at Home](/images/vorticella.png)
![[Microscopic Photography] Master Eyepiece Projection Photography: The Ultimate Hack to Beautifully Record Microscopic Details](/images/tool_clip_lens.png)
![[Microscopic Photography] Master Aquarium Diatom Scraping: The Ultimate Hack to Beautifully Record Microscopic Details](/images/tool_breeding_kit.png)